


Jader Gil
Marketing Expert
September 12, 2026
9 min read
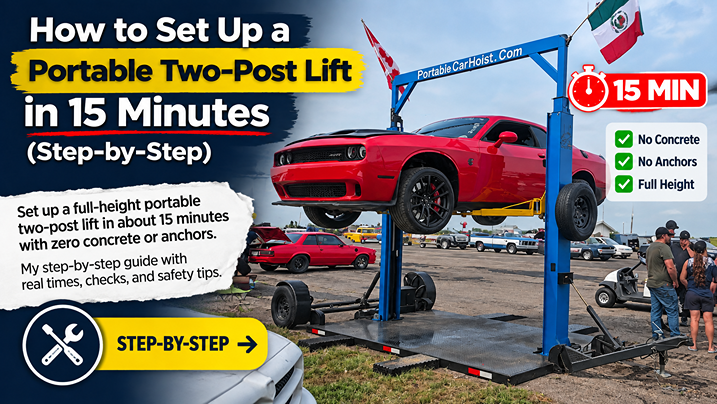
You can set up a portable two-post lift in about 15 minutes — no concrete, no anchor bolts, no permits, and no waiting on an installer. I have timed it more times than I can count, and from the moment the trailer deck is parked to the second a car clears the ground, we are talking a quarter of an hour with one person. Compare that to a fixed two-post lift, where you pour a slab, cure it for up to 28 days, and pay a crew to bolt it down. Our full-height portable hoist skips every bit of that, which is exactly why mobile mechanics, shop owners, and serious home wrenchers keep switching to it.
In this guide I am going to walk you through the exact setup — the checks I run first, the five steps I take, the times each one really takes, and the mistakes that turn a 15-minute job into an afternoon. Grab a coffee; you will not need it for long.
Here is the honest version. The hoist ships mounted on its own black diamond-plate flatbed trailer deck. The two posts, the synchronized top beam, the arms, the ramps, and the spare wheels all travel with it. You are not assembling a lift from a pile of parts in a crate — that is the whole point of a portable car hoist that works without concrete or bolts. Setup is mostly positioning, leveling, and a quick power connection, not construction.
When people ask me “is it really 15 minutes,” my answer is yes, once you have done it twice. Your first setup might run 20 to 25 minutes while you get a feel for the leveling. By the third time, you will beat 15 without rushing. This is the same fold-and-go convenience I break down in our post on the fast-setup, no-anchor hoist in action — the design does the heavy lifting so you do not have to.
Ninety percent of slow setups come from skipping these three checks. Spend two minutes here and the rest goes smooth.
The trailer deck is your foundation, so it needs firm, reasonably level ground. Concrete is ideal, but you do not need it — compacted asphalt or hard-packed gravel works too. I cover the surface question in detail in can you use a portable car lift on asphalt, gravel, or uneven ground. The short version: a small slope is fine because you level the deck itself, but avoid soft dirt, mud, or a grade steeper than a driveway apron.
Because this is a full-height lift with a synchronized top beam — not a low-rise — you need vertical room. Measure your ceiling before the truck arrives. I put the exact math in how much ceiling height you need for a two-post car lift, but the rule of thumb is simple: the top beam sits around the height of the posts, so make sure a door, rafter, or garage opening is not in the way. Outdoors, this is a non-issue.
The hydraulic power unit needs electricity. Most setups run on standard shop or household power, and mobile crews run off a generator or the work van. If you are building out a rig, our guide to building a mobile mechanic van that lifts cars anywhere covers powering the lift on the road. Have your cord or generator staged before you start the clock.
Here is the full sequence, with the real times I hit on a normal day.
Back the trailer into place and park it where you want to work. Leave yourself room to open doors and walk both sides of the vehicle. Chock the trailer wheels and disconnect from the tow vehicle if you are staying put. That is it — the deck itself is your base, so there is nothing to pour and nothing to bolt into the ground, which is the same anchor-free principle behind lifting vehicles without floor anchors.
This is the step that decides everything. Drop the leveling supports and adjust until the deck sits flat and stable. Use the built-in indicators and a torpedo level across the deck. You are not fighting the ground here — you are leveling the platform on top of it, which is exactly why the portable design handles surfaces a bolted lift never could.
Pro tip: Level side-to-side first, then front-to-back, and re-check after you set the supports — the deck can settle a hair when it takes weight. Thirty extra seconds here prevents a wobbly lift and a crooked car later.
Plug in the hydraulic power unit and run the carriages up and down once, empty, to prime the system and confirm smooth travel. Listen for even movement on both posts — the synchronized top beam keeps the two carriages rising together, so you should see them stay level. This dry cycle is your quick health check before any weight goes on. If you want the deeper mechanical picture, our hydraulic portable car lift technology and maintenance guide explains what is happening inside the system.
Swing the lifting arms into their reach positions and confirm the mechanical safety locks click and release cleanly. Never skip this. The locks are what hold the car if hydraulic pressure ever drops, and testing them empty takes seconds. I am a broken record on this because it matters — see are portable car lifts safe, and how the locking systems work for why the locks are non-negotiable.
Drive or roll the vehicle onto the ramps and center it between the posts. Set each arm pad under the manufacturer’s recommended lift point, snug them up, and raise the car a few inches. Stop, walk around, and shake-test the vehicle to confirm every pad is seated. Then lift to working height and drop it onto the nearest safety lock. You are standing under a solid car in about 15 minutes total. If you are moving from jack stands, you will feel the difference immediately — here is why jack stands are so dangerous in the first place.
People love to argue about whether “15 minutes” is marketing or reality, so let me lay the clock out honestly. Positioning and chocking the deck is about two minutes. Leveling is your three-minute investment and the one step I refuse to rush. Connecting power and running an empty prime cycle is another three. Setting the arms and testing the locks is two. Spotting the vehicle, seating the pads, shake-testing, and lifting to height is roughly five. Add it up and you are at 15 minutes with a car in the air — and that is a comfortable pace, not a race.
Where does the time actually go for beginners? Almost always leveling and lift-point placement. Those are judgment steps, not muscle steps, so the first two or three setups feel slower while you build the instinct for them. The mechanical parts — the deck, the hydraulics, the synchronized beam — are the same speed on day one as day one hundred. That is the beauty of a lift that arrives ready instead of one you build. It is the same reason so many pros describe how they skip installation entirely with these portable lifts: there is simply nothing to install.
The steps are identical whether you are in a bay or a driveway, but two things shift outdoors. First, overhead clearance stops mattering — open sky means you never think about ceiling height. Second, your surface check matters more, because a driveway or lot is rarely as flat as a poured floor. That is where the deck-leveling step earns its keep. I have set this lift up on sloped aprons, event lots, and gravel yards, and the platform-leveling design is what makes that possible. If your driveway is your shop, our guide on how to lift cars in your driveway safely walks through the outdoor version start to finish.
The reason setup is measured in minutes and not days comes down to one decision: the lift lives on its own trailer deck. There is no separate foundation because the deck is the foundation. That single design choice erases the slab pour, the cure time, the anchor drilling, and the installer’s invoice. It is also why the whole rig folds down and tows away when you are done — you can reconfigure a shop floor with no concrete or take the lift to a customer’s driveway on the same afternoon.
That mobility is the whole business case for a lot of our customers. A mobile mechanic can take the shop to the customer, a landlord-restricted renter can run a two-post lift in a lease-friendly setup without touching the concrete, and a homeowner with a tight garage can lift and then tuck everything away. Fast setup is not a gimmick — it is what makes all of those use cases possible.
After helping a lot of first-timers, I see the same handful of slip-ups. Skipping the deck level is the big one — rush it and you will chase a wobble the whole job. The second is bad lift-point placement; pads under a pinch weld or a plastic panel instead of the factory lift point is dangerous, and it is the root of most of the car-lifting safety mistakes DIY mechanics make. The third is ignoring capacity — know your vehicle’s weight and match it to the lift, which is easy once you read how to pick the right car hoist capacity. None of these add time when you do them right; they only cost you when you skip them.
If you are still comparing options before you buy, our complete portable two-post car lift buyer’s guide lays out capacities, heights, and features, and portable car hoist vs. a traditional two-post car lift shows exactly where the fast-setup, no-concrete approach pulls ahead.
A full-height, American-made portable two-post hoist gives you the standing-height access of a fixed lift with none of the concrete, drilling, permits, or installer fees — and it is ready to work in about 15 minutes. Whether you are outfitting a shop, going mobile, or finally getting off jack stands at home, this is the fastest path to lifting cars safely. Here is the step-by-step guide to ditching jack stands for good. When you are ready, book a free quote and we will help you match the right capacity to your work and get you set up fast.
Yes. The whole design is built for a single operator — positioning the trailer deck, leveling it, connecting power, and setting the arms are all one-person jobs. A helper speeds up spotting the vehicle, but you do not need a crew, and you never need an installer.
No. The hoist mounts on its own diamond-plate trailer deck, so the deck is the foundation. There is zero concrete, zero anchoring, and zero permits — that is what lets you set up in about 15 minutes and tow it away afterward.
Firm, reasonably level ground. Concrete is ideal, but compacted asphalt or hard-packed gravel works because you level the deck itself. Avoid soft dirt, mud, or a steep grade. A small slope is fine since the leveling supports take up the difference.
About the same as setup — roughly 15 minutes to lower the lift, retract the arms, raise the supports, and hook the trailer back up. Fold-and-go works in both directions, which is the point of a portable hoist.
Portable Car Lift for a Home Garage: Setup & Safety Guide
Half Car Lift vs. Full-Height Hoist: Stop Kneeling, Start Standing
Single-Post vs. Two-Post Portable Car Lift: Which Holds Your Car?
No Garage, No Problem: How to Lift Cars in Your Driveway Safely